Thursday 31 January 2013

THE CAKE DEPRESSION


This year Time To Change launched a huge awareness campaign about Mental Health. They are trying to challenge the stigma that people encounter when they open up about their mental health issues.

Fact is we all know someone with a mental health problem, we may be someone with a mental health problem.

It could be depression, OCD, bipolar disorder, or even an eating disorder. You could be someone who self harms to cope, or has thoughts about suicide. You could be someone who can't leave the house without having a panic attack.

It affects one in four people – so you either know or are someone who has been dealing with some form of mental illness. To raise awareness, the notorious Eat Your Heart Out curated by Miss Cakehead, are opening The Depressed Cake Shop.
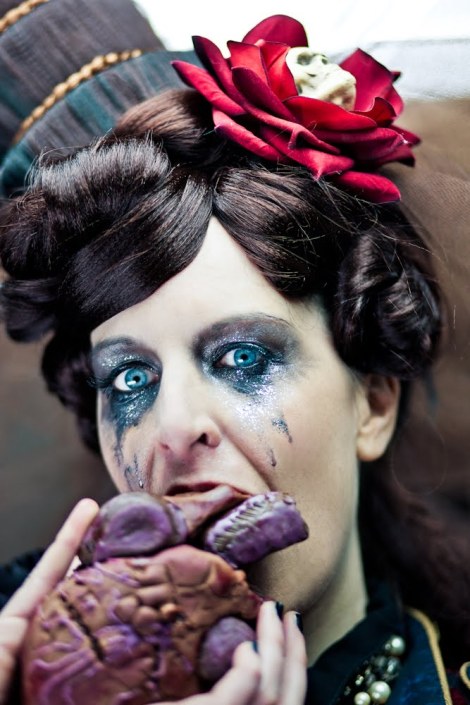
EYHO have been turning stomachs (and baking anatomically correct ones too) since Miss Cakehead opened the iCake pop up shop in tribute to Steve Jobs' passing, and the Wesker & Sons human butchery to mark the launch of the latest Resident Evil game. Since then her amazing food artists have gone on to raise awareness of sexual health with STD cakes, and all manner of medical conditions at the Pathology Museum in London.

It's hard to talk, never mind think about the dark side of mental health. So to that end, bakers from all over the country are creating confections that aren't quite up to scratch. Cakes that don't feel quite right today. Cupcakes that don't have the strength to get out of bed in the morning.

By showing on the outside how mental health can affect us on the inside, The Depressed Cake Shop will not only raise money for Time To Change – but raise awareness too.


The Depressed Cake Shop will launch later this year.


Top photo, Miss Cakehead. Mid photo, Conjures Kitchen

-JULIE

Wednesday 30 January 2013

DIY BIRD


Well what a week of winter adventures it has been! After being hit with a foot of snow, I need a reminder that spring is coming, and one day the sun will shine again. So I decided to make this cute and colourful bird sitting on a stick to remind me that one day there will be colour in the world again (not that I don’t love the snow and winter, but I am ready for summer now!).  
So first off you’ll need to gather what you need – a stick you like the shape/length of, some toy stuffing, scraps of fabric, yarn, and ribbon in the colour scheme you’d like. Pile up your goodies and absorb the colours for a moment. Smile. Make a brew. You’re ready.

THE STICK
Take your stick, and starting at one end, wrap the yarn around it. 


To start, glue the yarn 1-2cm from the end of the stick, then take the yarn back to the end and start winding it. This way you’ll cover the place where you glued your yarn. Keep going along the stick. When you want to change colour, glue your new yarn onto the stick, and wrap the yarn you are using around the stick for a little bit so you cover where you have glued the next one. When you get to the end of the stick, put a small blob of glue near to the end of the stick and wrap the yarn around it. 

THE BIRD
Find or draw a bird template that you like the shape of. For one bird you’ll need to cut out 2 body shapes and 2 wing shapes. Sew your wing shapes onto the body shapes.


Lay the body shapes right sides together and pin. Sew around the shape, half a cm in from the edge. Leave a gap of about 6-8 cms along the back of the bird. 
Turn your bird the right way out. Fill with stuffing and sew up the gap in the back.


Using black embroidery cotton, embroider eyes onto the bird (you could use buttons if you prefer). Your bird is finished!
PUTTING IT ALL TOGETHER
Cut out 2 leaf shapes from green felt.


Take a moment to arrange your bird and leaves on the stick, and see what looks best. Attach your leaves, either by sewing them on, or with glue (a hot glue gun would work best), and then attach your bird in the same way. 

Attach ribbon and hang up your lovely bird on a stick!
-JENNY

Tuesday 29 January 2013

NOT FOR GIRLS


I was just as shocked and offended as any other self-respecting woman or girl when first hearing about ‘Lego for Girls’. Like most other toys, there are set options for girls and boys. Barbie or Action Man, a fake kitchen or a fake gun; but what if you want to have both? What if you want to spend a day at the shooting range then come back and cook up a lovely homemade meal? From birth, society has little girls and boys believe that they must fit into unrealistic stereotypes and if you don’t, well, you’re just plain queer. A boy who wants to style Barbie’s hair? Must be gay. A girl who wants to put on camouflage and makes guns out of sticks? Must be a tomboy.
I have been called a tomboy ever since I was very young, and I put this all down to the fact that I have an older brother who had very stereotypically boyish toys that I liked to steal. I was never discouraged by my parents from playing with these ‘boy’s toys’, however I was regularly called a tomboy nonetheless. When this word is carefully considered, it becomes evident that as a young girl you are not given permission to be a girl who likes climbing trees or playing in the mud, you are a girl who is trying to be like a boy, but you will never be a boy, and you will presumably never be as good as one. This is how many women feel throughout their entire lives: school, puberty, relationships, sex, jobs, careers etc.
I want the term ‘tomboy’ to be reconsidered, because even though I fell under this category as a young child, and possibly even now as an adult, my Barbie dolls were never far away and I did own a plastic kitchen or two. As a young adult woman I adore cooking, styling my hair, doing my make-up and picking out my clothes. However if I am also daring, intelligent and brave, I am not called a strong girl, I am called a tomBOY. As a very young girl this lead to me telling myself that I didn’t want to be a girl, I wanted to be a boy. I wanted to be stronger and faster and braver and cooler and girls just aren’t any of those things. Girls are dainty and they stand at the side of the playground watching the boys do dangerous things.

It makes me incredibly sad to think that I was not proud to be a little girl, but as the stereotyping between boys and girls has only got more complicated and more irrational with age, I have begun to learn to love myself and understand that I can be strong and intelligent as well as being feminine and I can be proud to call myself a woman, and a woman only.

For more information on this issue, please visit here, here and here.
-ANNA


Saturday 26 January 2013

ALEXA FOR MAJE


An entirely new label for me, I've only recently become keen again on trawling through fashion websites and blogs after a  few months of being a bit disillusioned with clothes.

From the looks of it, this collection may just be the one to kickstart my foray into a world of clothes without pattern... well, a more minimalist pattern. I have way too many clothes with patterns that they're becoming more and more difficult to mix and match, so hopefully French label Maje can show me the light. And I'm a sucker for Alexa Chung, if she's wearing it I usually want it.


-FERN


Wednesday 23 January 2013

GRRL POWER


These handmade brooches are a great way to show your support and enthusiasm for Feminism, or any other cause you may feel passionate about. They are easy and affordable to make in large batches, for friends, or even just for personal use.


To make a word brooch you will need a selection of lettered beads (which you can either buy online or find in any arts and crafts store), safety pins, super glue and some strong tape i.e. parcel or duct tape (1). You will also need an old magazine or piece of card, and a pair of scissors.
Start by arranging your letters onto the back of your magazine or piece of card. Separate the letters slightly and place a small drop of super glue in between each letter, then push the beads together to form your word (2). Leave to dry for the amount of time suggested on your tube of super glue.
Once your beads are dry, use some scissors to carefully and neatly cut around your word, keeping as close to the edge of the beads as possible in order to disguise the card or paper (3).
Finally, secure your safety pin to the back of your lettering, ensuring that the opening side of the pin is facing away from the beads (4). Cut a small strip of tape and place it over the safety pin, pressing down on either side of the tape with your fingernails to make sure it is firmly stuck down (5). For an extra strong hold, I recommend attaching your safety pin with a glue gun.
Your finished brooch (6) can be pinned onto just about anything including jackets, shirts and bags. After step 3, you can alternatively super glue your brooch straight onto an object of your choice, for example, a bag, for a more permanent statement.


- ANNA

Tuesday 22 January 2013

NEW FRONDS


Since we've moved house I've needed to decorate my bedroom for some time now. I keep looking for inspiration, but I'm always drawn to 1960s patterns, and I've really just got to accept that it just isn't going to suit my bed frame - a cream, wrought iron vintage style. But just when I was beginning to get my head around the idea of keeping things more muted I stumbled upon this interiors editorial in YOU magazine.

The patterns are like grown-up versions of others I've looked at, and I'm so indecisive I don't think I could commit to a wallpaper - but cushions that can easily be changed I'm all for. Getting rid of white walls and setting a moody tone using dark greys is so much more bedroom-appropriate, don't you think? 


-FERN

Monday 21 January 2013

BLANKET STATEMENT


Recently I have had a bit of an obsession going on with blankets. There’s nothing quite like snuggling under a blanket with a mug of tea and a good book on a cold winter’s day, or cuddling your favourite little person wrapped up in some gorgeous handmade goodness. And let’s face it, if this cold weather continues, we will need all the blankets we can get!
I have had a few blankets on the go at the same time over winter – I finished my patchwork blanket last week. The fabrics I have used for the patchwork are all from fabricrehab.co.uk, and I used a fleecy throw for the back. Instead of using binding, I folded over the backing fabric to bind the sides, as I didn’t want to add any more colour, and I used super cheap polyester wadding.

This is my labour of love – my crochet ripple blanket. I got the pattern from attic24, which is a blog I would absolutely recommend for crochet inspiration. I accidentally made my blanket six and a half feet wide, so it’s taken me three months to get to this stage! It’s a mismatched jumble of different yarns in all different colours, but I love it. I’m hoping it will be finished in time for winter 2013!


I love the story that comes with a blanket – the fact that a blanket means family time watching a film with your favourite people, or some much needed alone time with a book and some peace and quiet. I love that a blanket symbolises warmth and comfort. There’s nothing that my favourite 5 year old likes more than to be wrapped up in a blanket and carried around. So, with all those thoughts in mind, here is some blankety inspiration from all across the internet...


- JENNY

Friday 18 January 2013

WE'RE COMING


Don't worry, we've not disappeared along with 2012, we'll be back on Monday - for good.